Here it is – the over/under wrap with a beautiful bow embellishment! If you want to try this, make sure the top scarf is thin enough to work with the bow. I think this is one of my current favourites!


Here it is – the over/under wrap with a beautiful bow embellishment! If you want to try this, make sure the top scarf is thin enough to work with the bow. I think this is one of my current favourites!

After last week’s surprise success with the colour yellow, I was encouraged by a special reader to try wrapping with a gold scarf. The funny (and amazing) thing is that within a few hours of receiving her suggestion, I was waiting for a friend who was running late and decided to duck into a gift shop. All their “winter” scarves were on a huge sale, and I put winter in quotes because included was a beautiful, sheer, woven gold scarf. This is the wrap that I created with it… and YES, I will make a video tutorial on how to do the twist part, because I just figured it out!
I took these photos with a faulty camera in a room with inadequate light, so I had to play with the settings on my computer to make them look acceptable… yay artsy!

This wrap is such a classic… and always gets a lot of “wow”s and questions. It’s easy! You can be a little less careful with it (ie leave scarf fringe hanging out, don’t line up layers perfectly) and it still looks put together. This one is exactly the same wrap that I show in this video, except minus one scarf.


Hope you are all doing well! Happy wrapping 🙂

Yellow. The colour that I long refused to wear.
I claimed that since it matched with my hair, I couldn’t pull it off because I would be “all one colour”. Somehow, when I started covering my hair, I neglected to realize that since my hair colour would no longer be showing, this logic no longer applied. Since covering my hair, I had always avoided yellow scarves and ran towards my favourite blues and greens.
Well, of course this logic was flawed, because my own “yellow” hair was no longer showing! Therefore I would not be all one colour if I wore it.
Thanks to my mistakenly holding this scarf up to my face in a store (I was reaching for the blue), I have realized that yellows and golds are probably some the most beautiful colours for me to wrap over my hair! I especially like this scarf because it is so big and soft… quite comfortable! And of course, my “tichel tiara” made it look even more elegant. I think this is one of my new favourites!


Lesson learned; Surprise yourself! 🙂

There is something important that I would like to say, probably the most important thing I have said on Wrapunzel since creating the site:
“Thank you.”
Yes, you! Over the last few days, I have received an overwhelming amount of love and response from this community. It has been much more than usual, and is the reason why I am going through my days with a perma-smile! These messages, comments, and emails have given me so much strength and encouragement. It is amazing how much love and blessing I can feel through your words, and I thank you for giving so much of your love to me and the others on here! It has made me reaffirm how much a site like this is needed in the world, and I am so grateful to have been given the tools to run it. I am also glad to announce that over the past two days, Wrapunzel has achieved the highest number of daily site visits since its creation… wow! Thank you so much to those of you who have been sharing the site. I would have never guessed that hair covering could help build so many bridges and create so much love!
On Saturday night, I has the opportunity to teach a hair wrapping class to the largest group of women that I have taught! The particular one was for a group of Sephardi women, and it was a wonderful experience. I made new friends, learned a lot, and am looking forward to doing many more events like this in the future. If you have any ideas of places that could use hair wrapping classes, I would appreciate the connection. I especially want to reach out to health centers in order to offer classes to ladies who are dealing with hair loss… I know that feeling beautiful during rough times can do wonders for self esteem and healing.
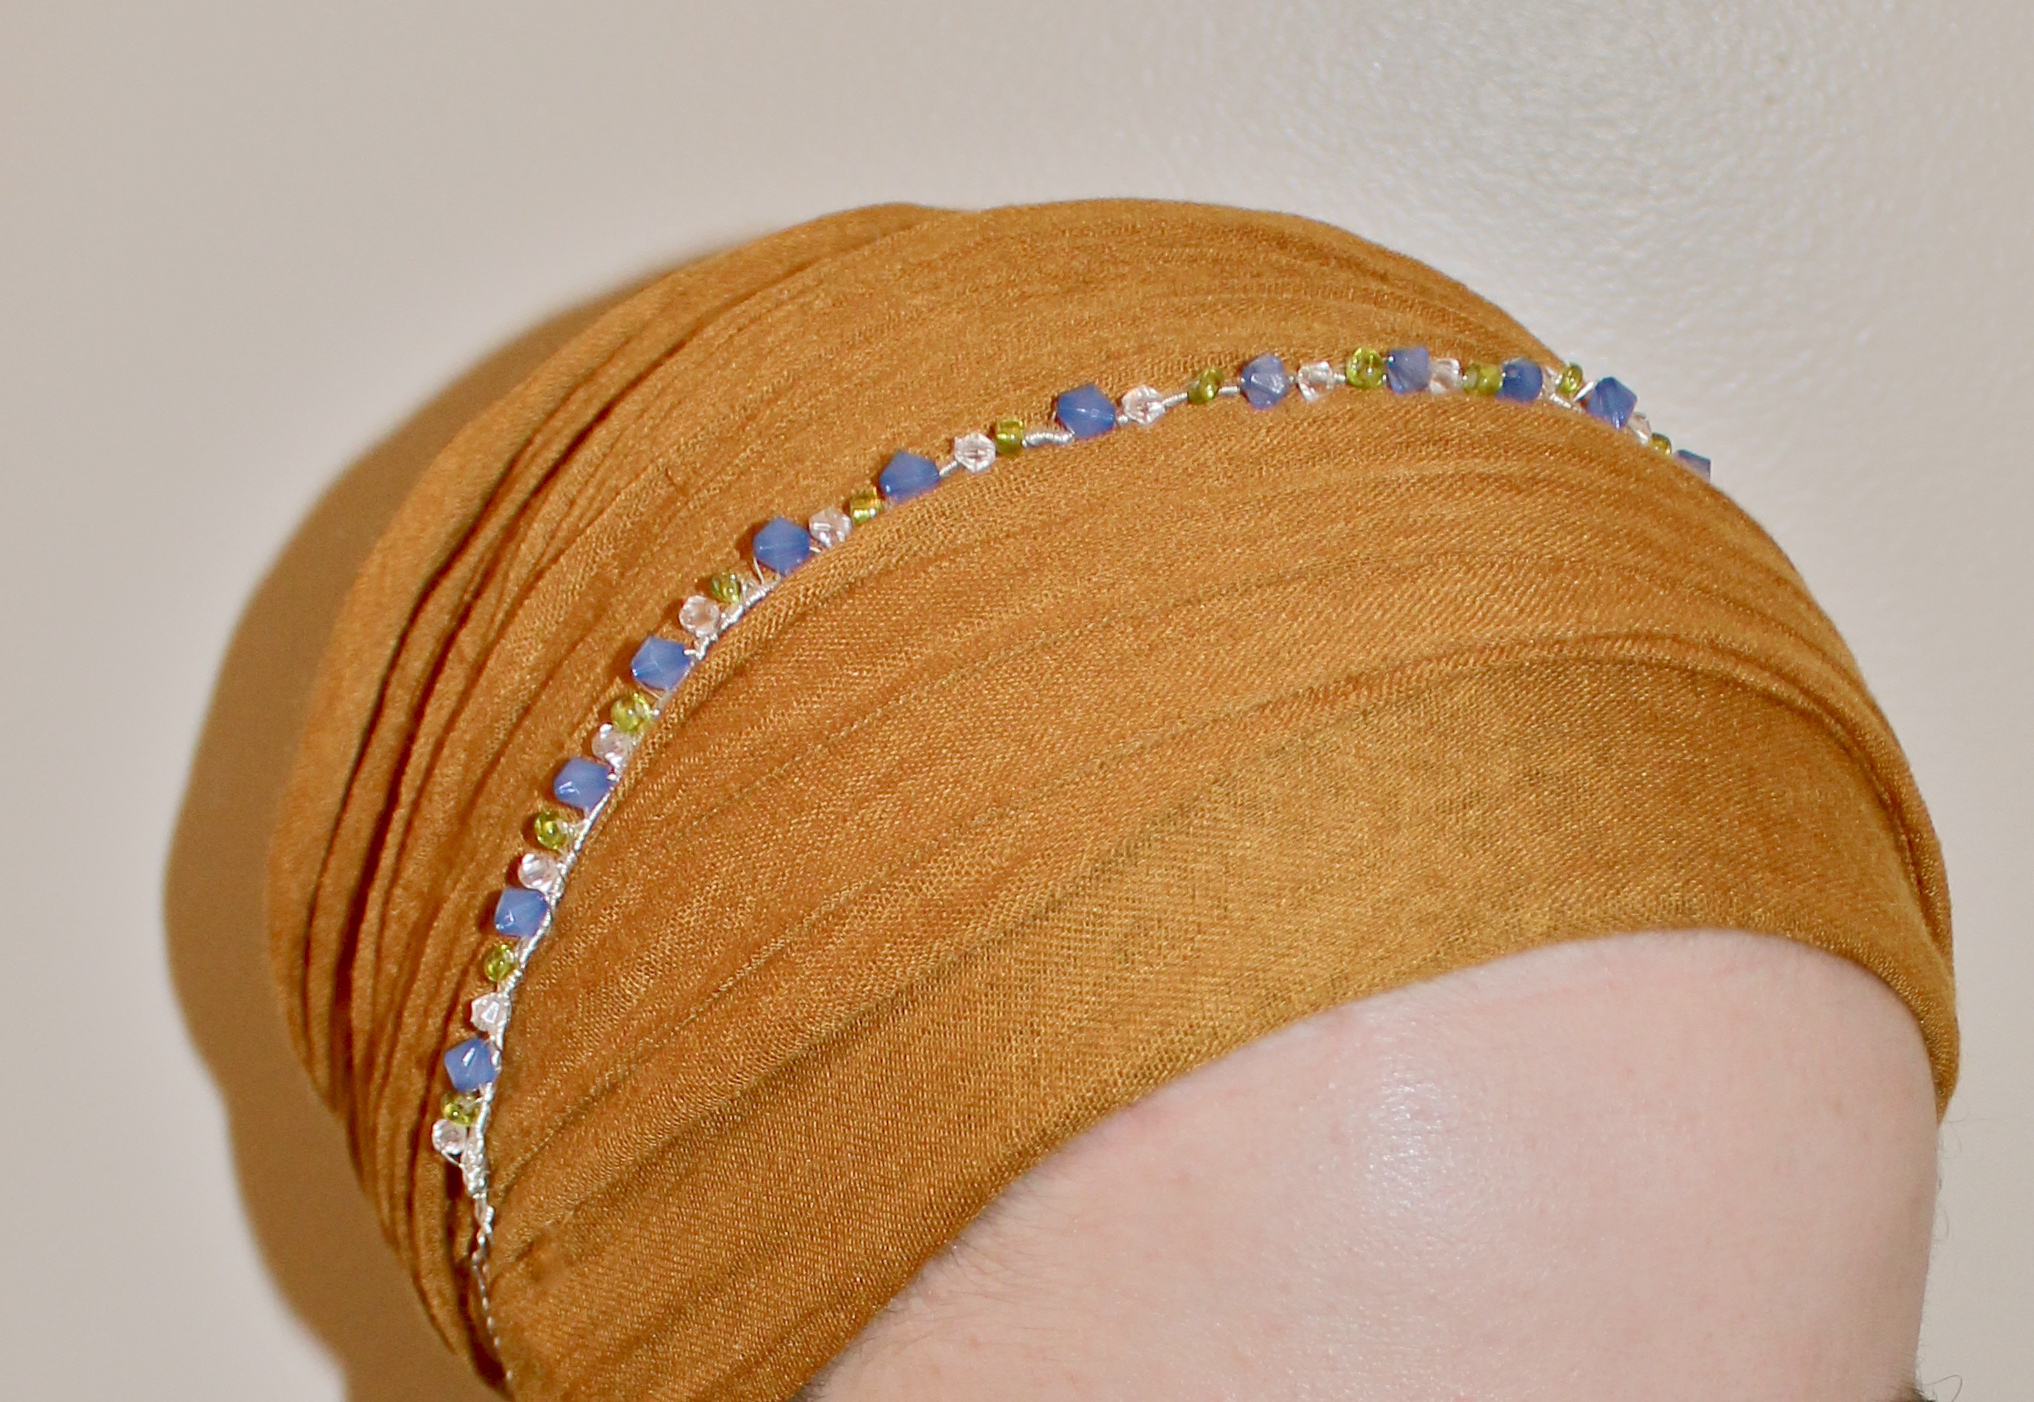
Anyway, I digress. This post is about gratefulness and yesterday I received the most exquisite gift; Batsheva, our “Lady Wrap Star” from the Golan sent me a package in the mail. I opened it and after her beautiful note made me tear up, I discovered that it contained beautiful jewellery and hair covering accessories that she had made by hand! I had no idea that she was such an artist, but now that I look back at her photos, I should have guessed! She apparently used to sell them but does not do so anymore… but I’m thinking we should encourage her to start up again because these are gorgeous (she did not ask me to make this post, but I got her permission – her creations are just too beautiful not to share)! I am especially inspired by her “Tichel Tiara” (the one in a spiral – it’s not a necklace), that is adjustable and will not cause pulling like the other headbands I use. Can’t wait to wear it! Here is what she sent me:


So, I want to wear them all at once, but since I realistically can only wear one pin with earrings and a necklace, here is today’s wrap!


I was intruiged by Batsheva’s description of the retro “Rachel Imenu” style, so I decided to try doing a wrap that incorporated it into the style. She was right, I did feel a bit dated (who knew that scarf wrapping had eras/trends?) but I actually got a lot of nice comments throughout the day!
Here is the knot at the top:
The colours are a little darker than what I usually go for, but with a bit of eyeliner I didn’t feel too washed out:


And the back of the wrap is one of my favourite ways to tie my bun area – the elegant double twist braid!


I am loving this multi-tonal, sparkly, sheer scarf that I recently found! To achieve the braid at the back, I put on the white scarf first, then the black over, and then blue one on top. All the scarves had one end short and one end long. Once they were all tied back, I braided the longer ones and brought them over the bun, securing them with an elastic to the shorter ends. Then I covered the elastic with a pretty flower pin!


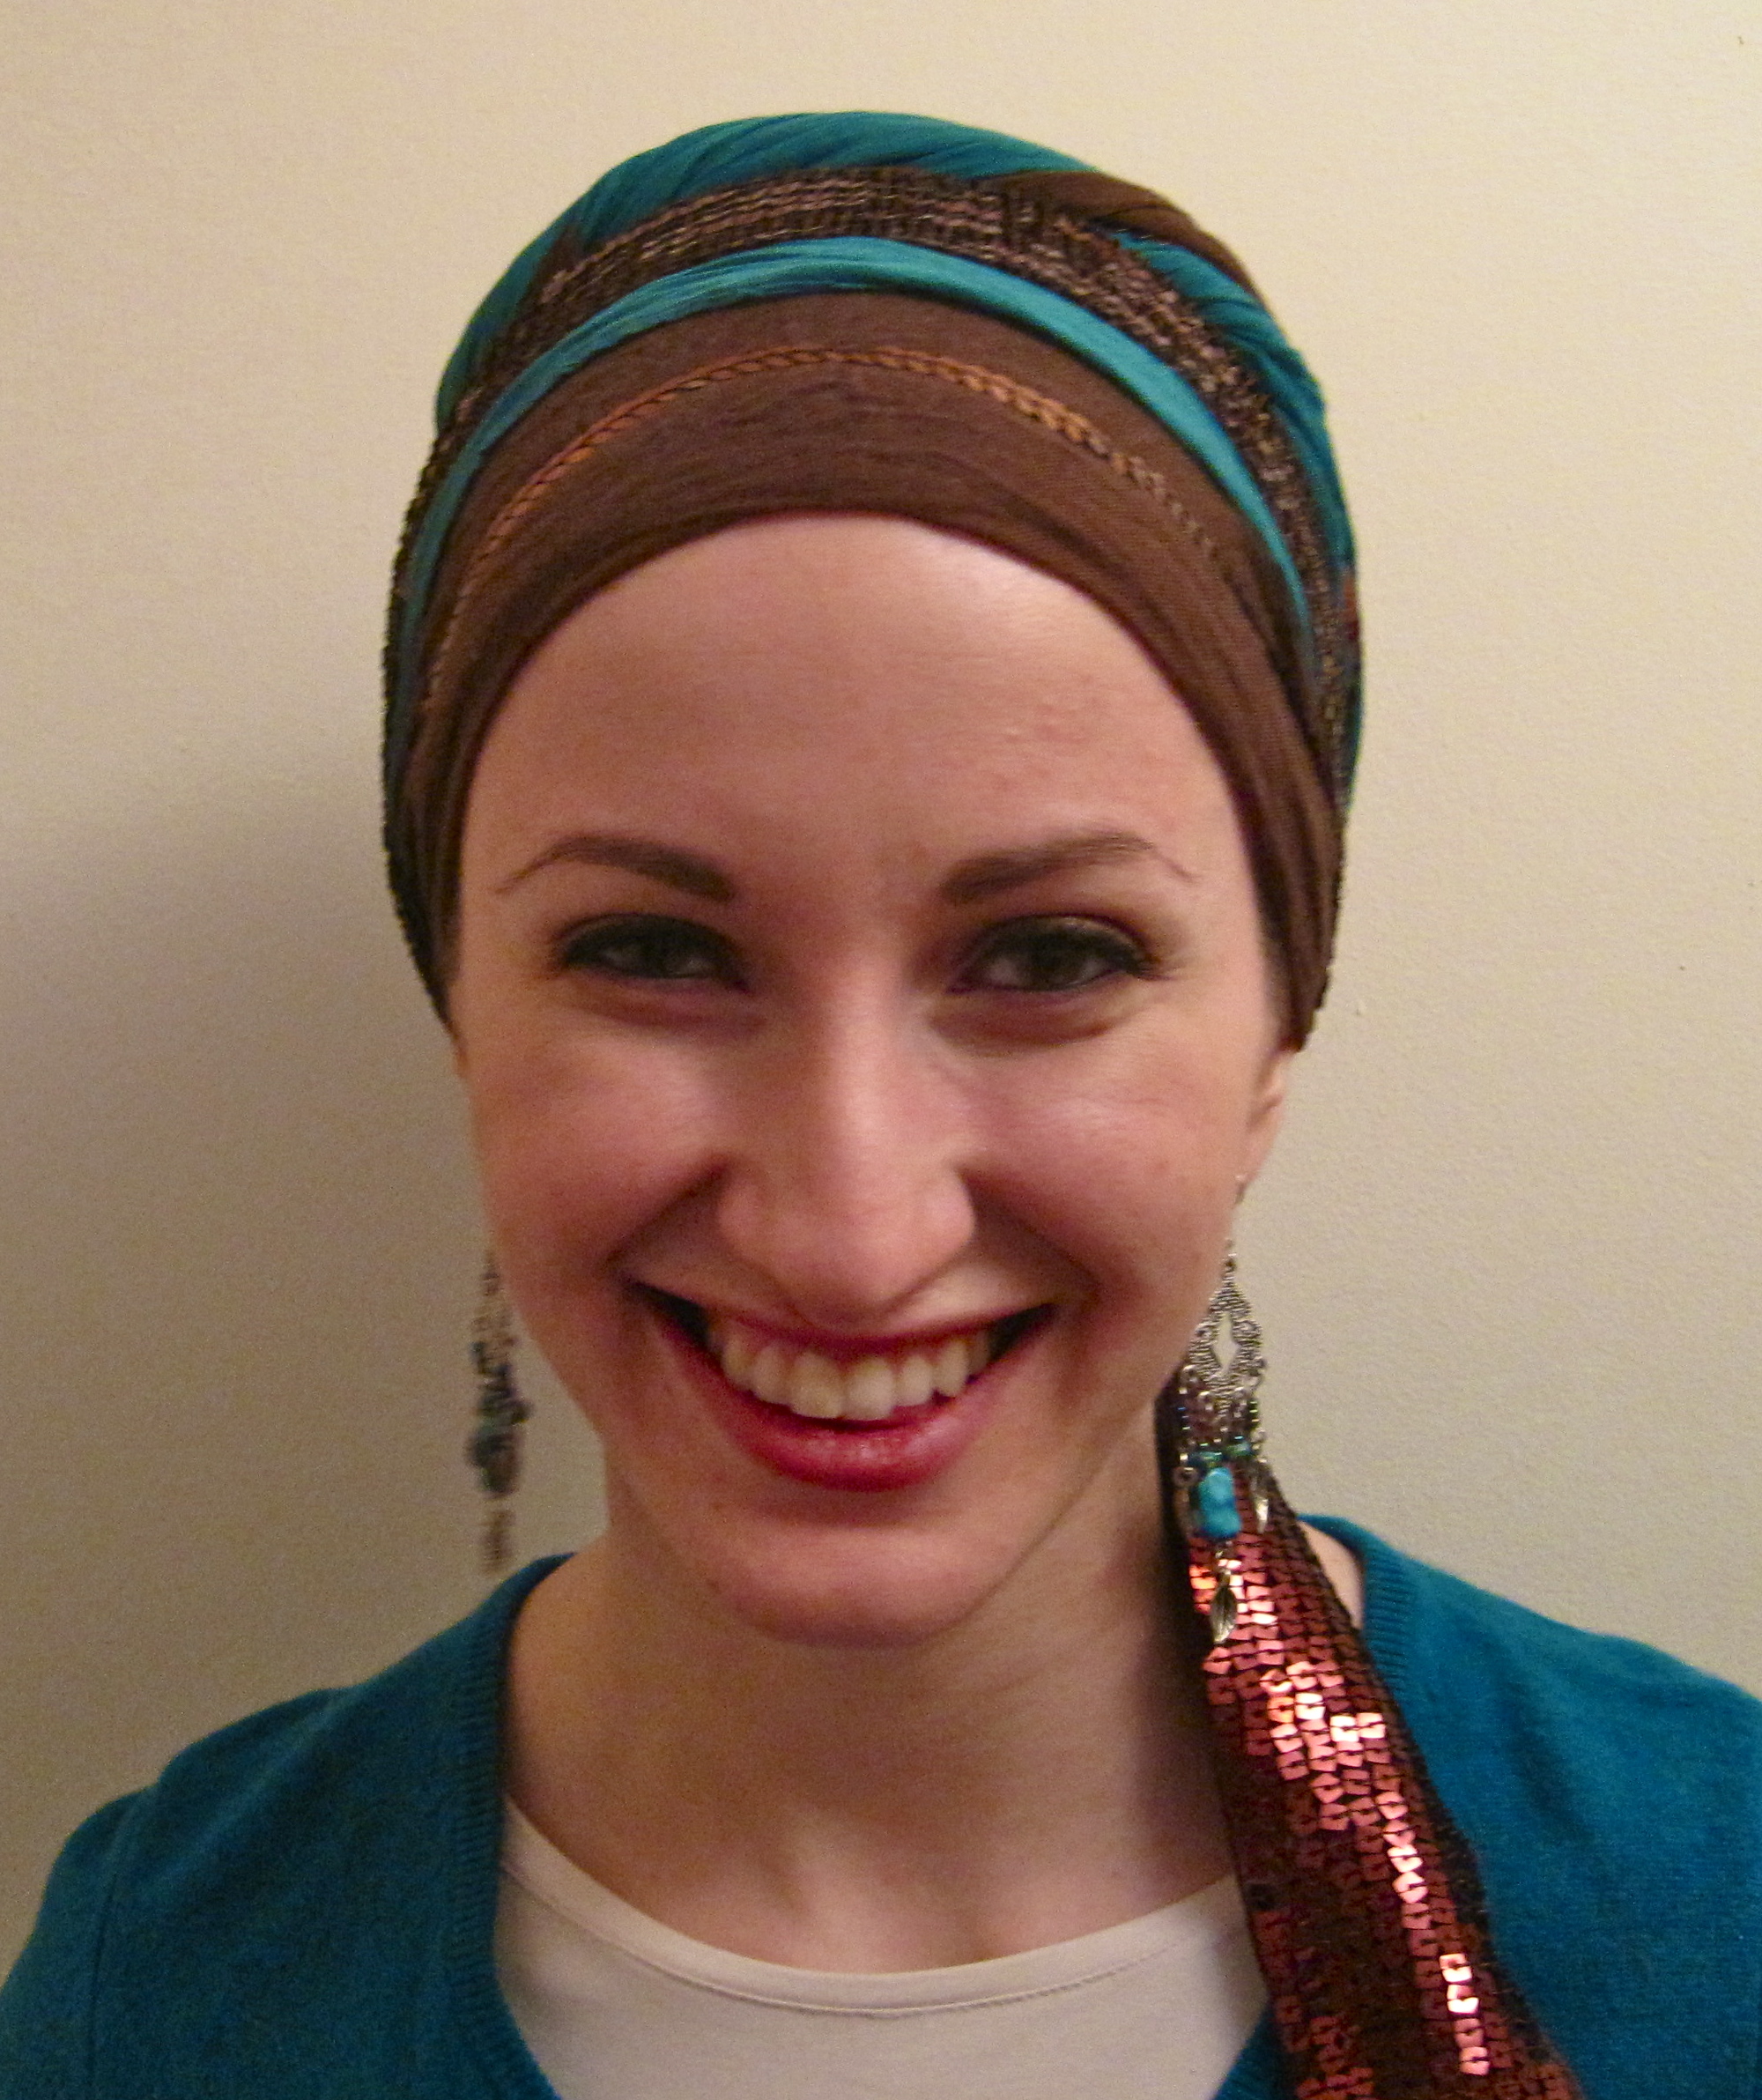
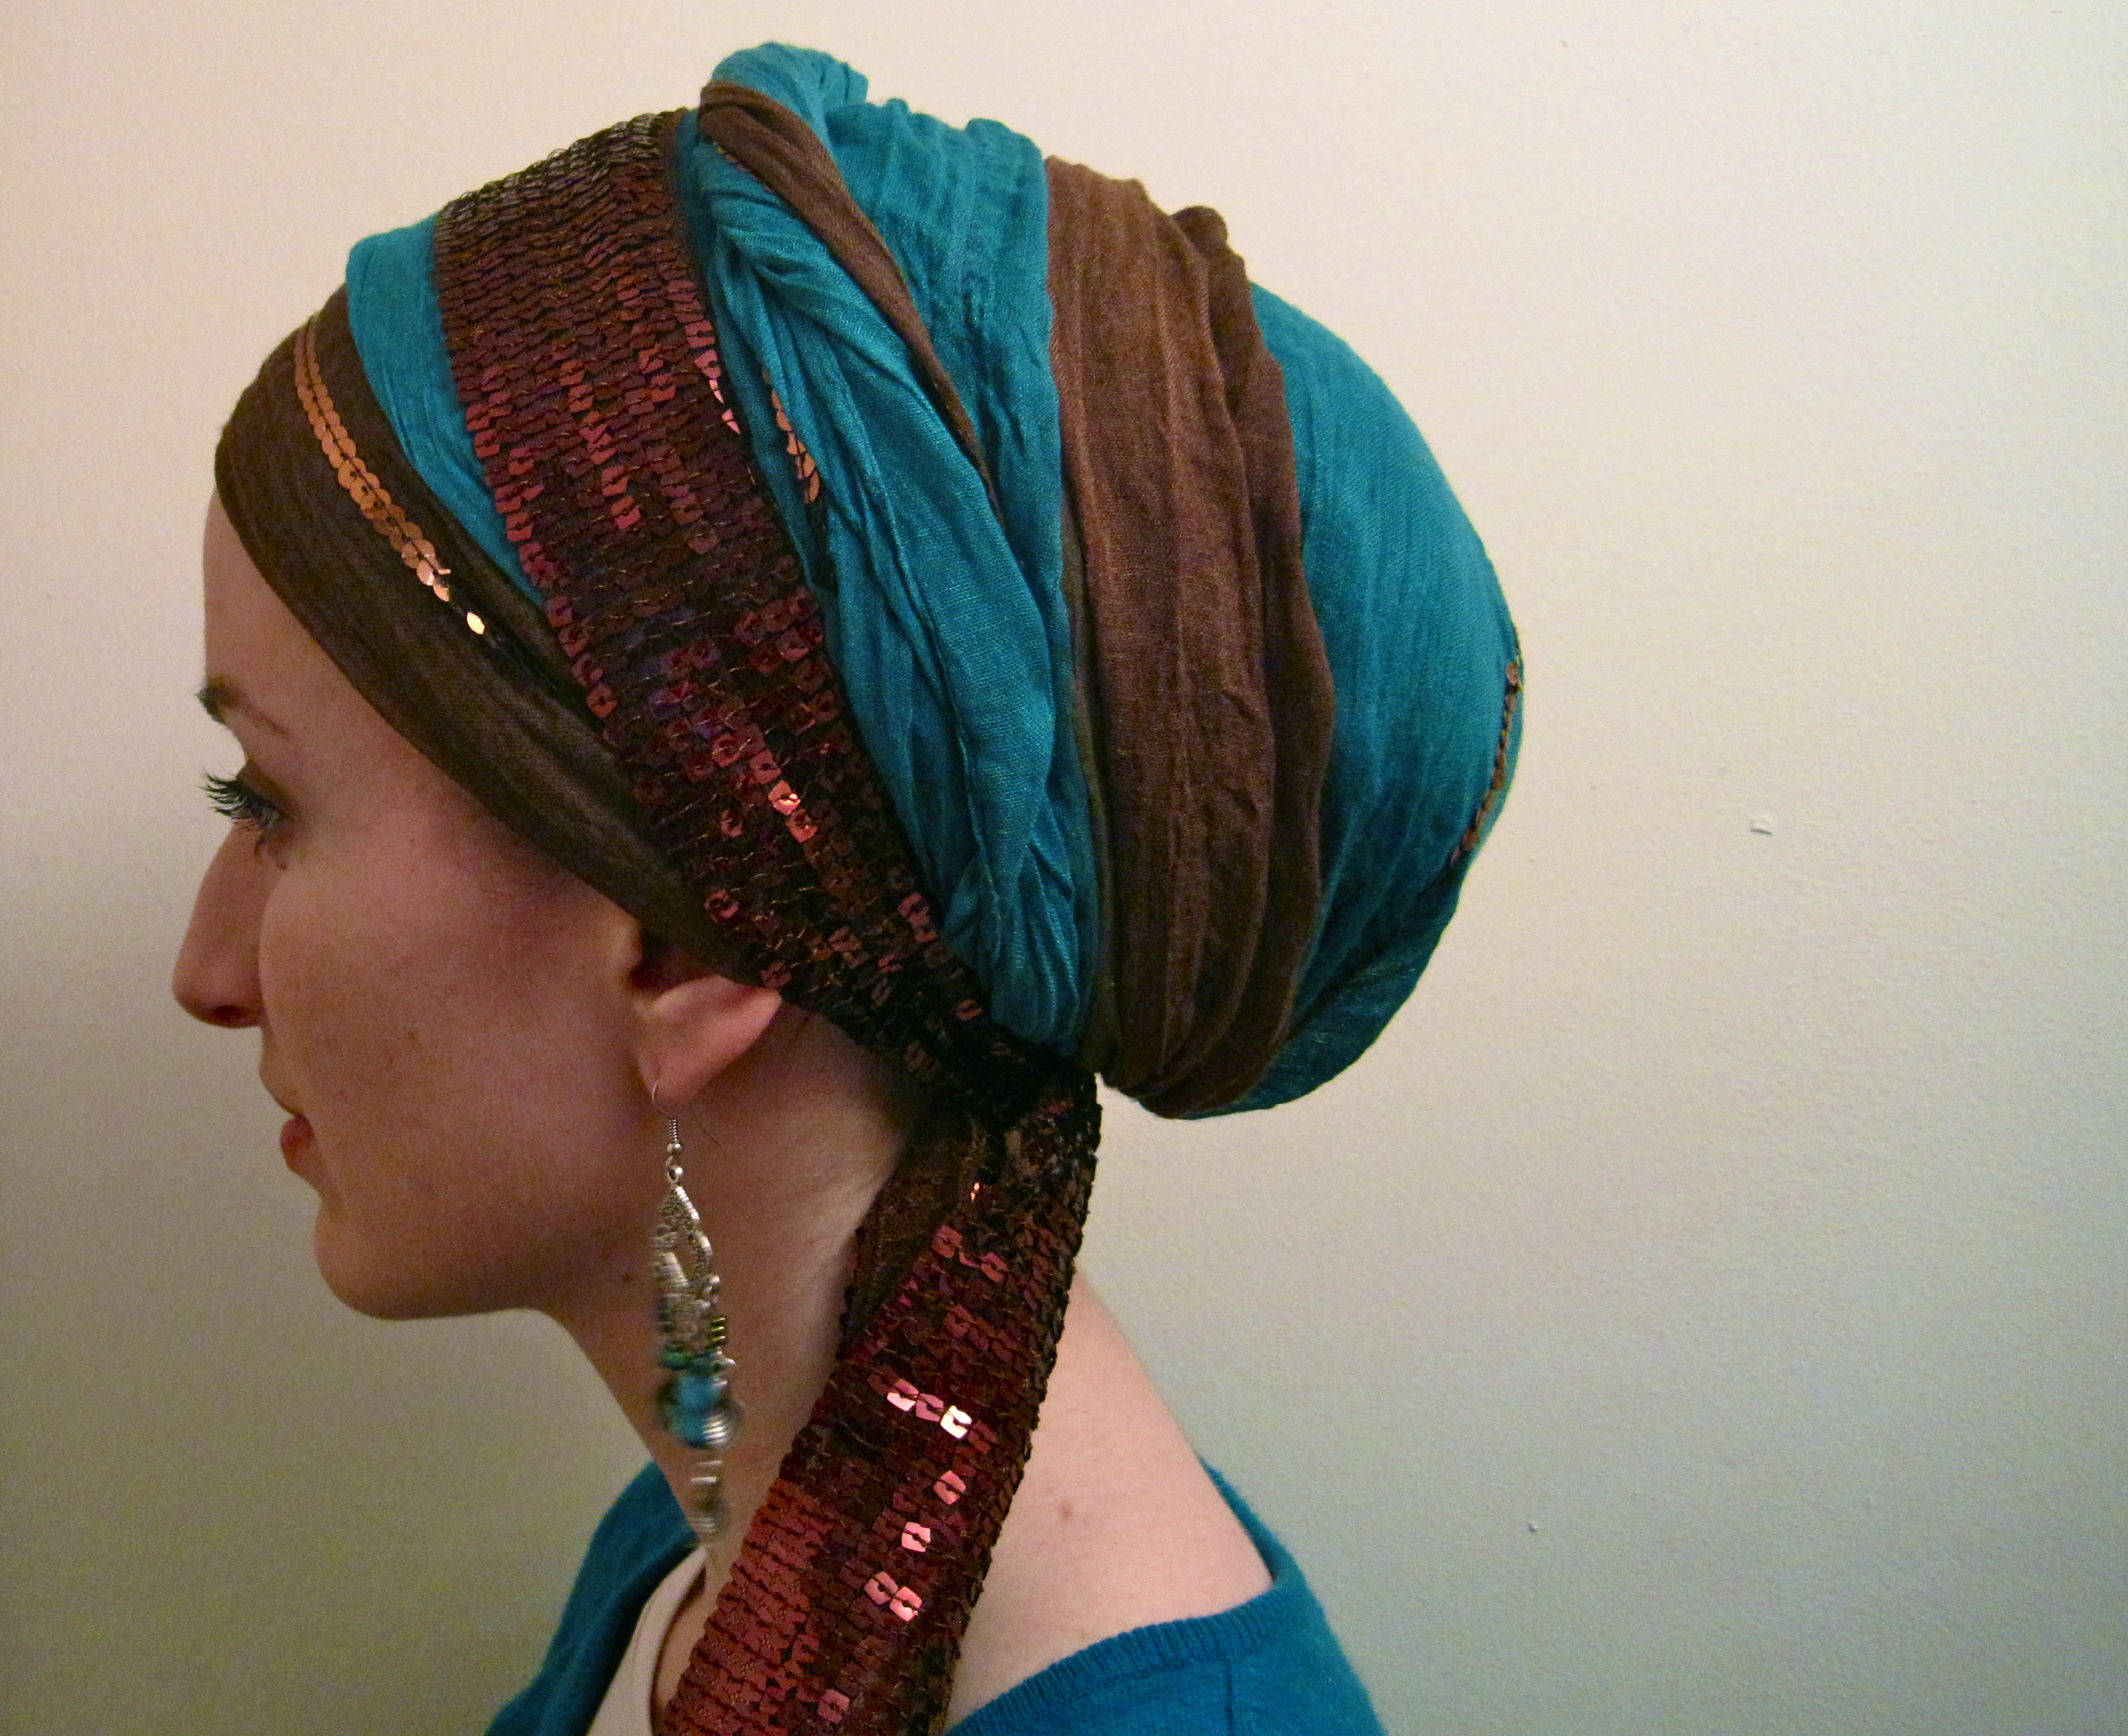
Oh teal, my favourite colour. So beautiful. This time, I paired it with a warm brown:

… that the director of your seminary in Jerusalem is in Chicago and you get to go to an alumni dinner! So, I am dressing accordingly:

This wrap is actually only one scarf and one sash. The scarf has three colours (black, brown and white) and the sash is a golden colour which matches my outfit and the pin perfectly. It’s funny that I used to be such a minimalist when it came to jewellery, but now that I cover my hair, I like wearing huge earrings!


The flowers and cotton texture of this wrap create softer, less formal version of the often worn black & white. This wrap can match almost anything!


I love the softness of this colour combination – goes perfectly with my warm, grey sweater!


I do have to say… I am quite happy with today’s wrap!


Take a look at the tutorial here. The pin that I added is something that I found in a thrift shop! I honestly don’t know how anyone would wear it other than on a headwrap 😛

Y’all encouraged my colour experiment with light green last week, so I am wearing the green scarf once more! I contrasted it with my blue flowered scarf and wrapped it into a layered wrap, which was surprisingly easy to do, given how long I’ve gone without tying one of these!


So the conclusion is: for those of you that may have had trouble with the “Layered Look” wrap, just be persistent! Once you get it, you won’t forget it! (The one difference between this wrap and the one in the video is that I tucked the ends into themselves instead of underneath the wrap, and left one of the green ends hanging down.)

Here is what was on my head today! I was inspired by the lady that commented, metioning how she likes to mix pale blue/green/purple hues with brown. I had a little trouble with the slippery fabric of the scarf so… easy solution: tie the ends together with a hair elastic! (in lieu of knots, which can come undone!) Of course, the pin on top hides this, so no one will know that you cheated 🙂


I always appreciate scarves that make your wraps look much more intricate than they actually are. Scarves that have multiple patterns and colours do this job very well as you can see in the following photos:


Yes, this is just one scarf, tied in the simplest long scarf wrap (see tutorial here). A beautiful beaded pin finishes off the look and the final result is something that looks much more complicated than it actually is. Yay!

